Steam Uploader
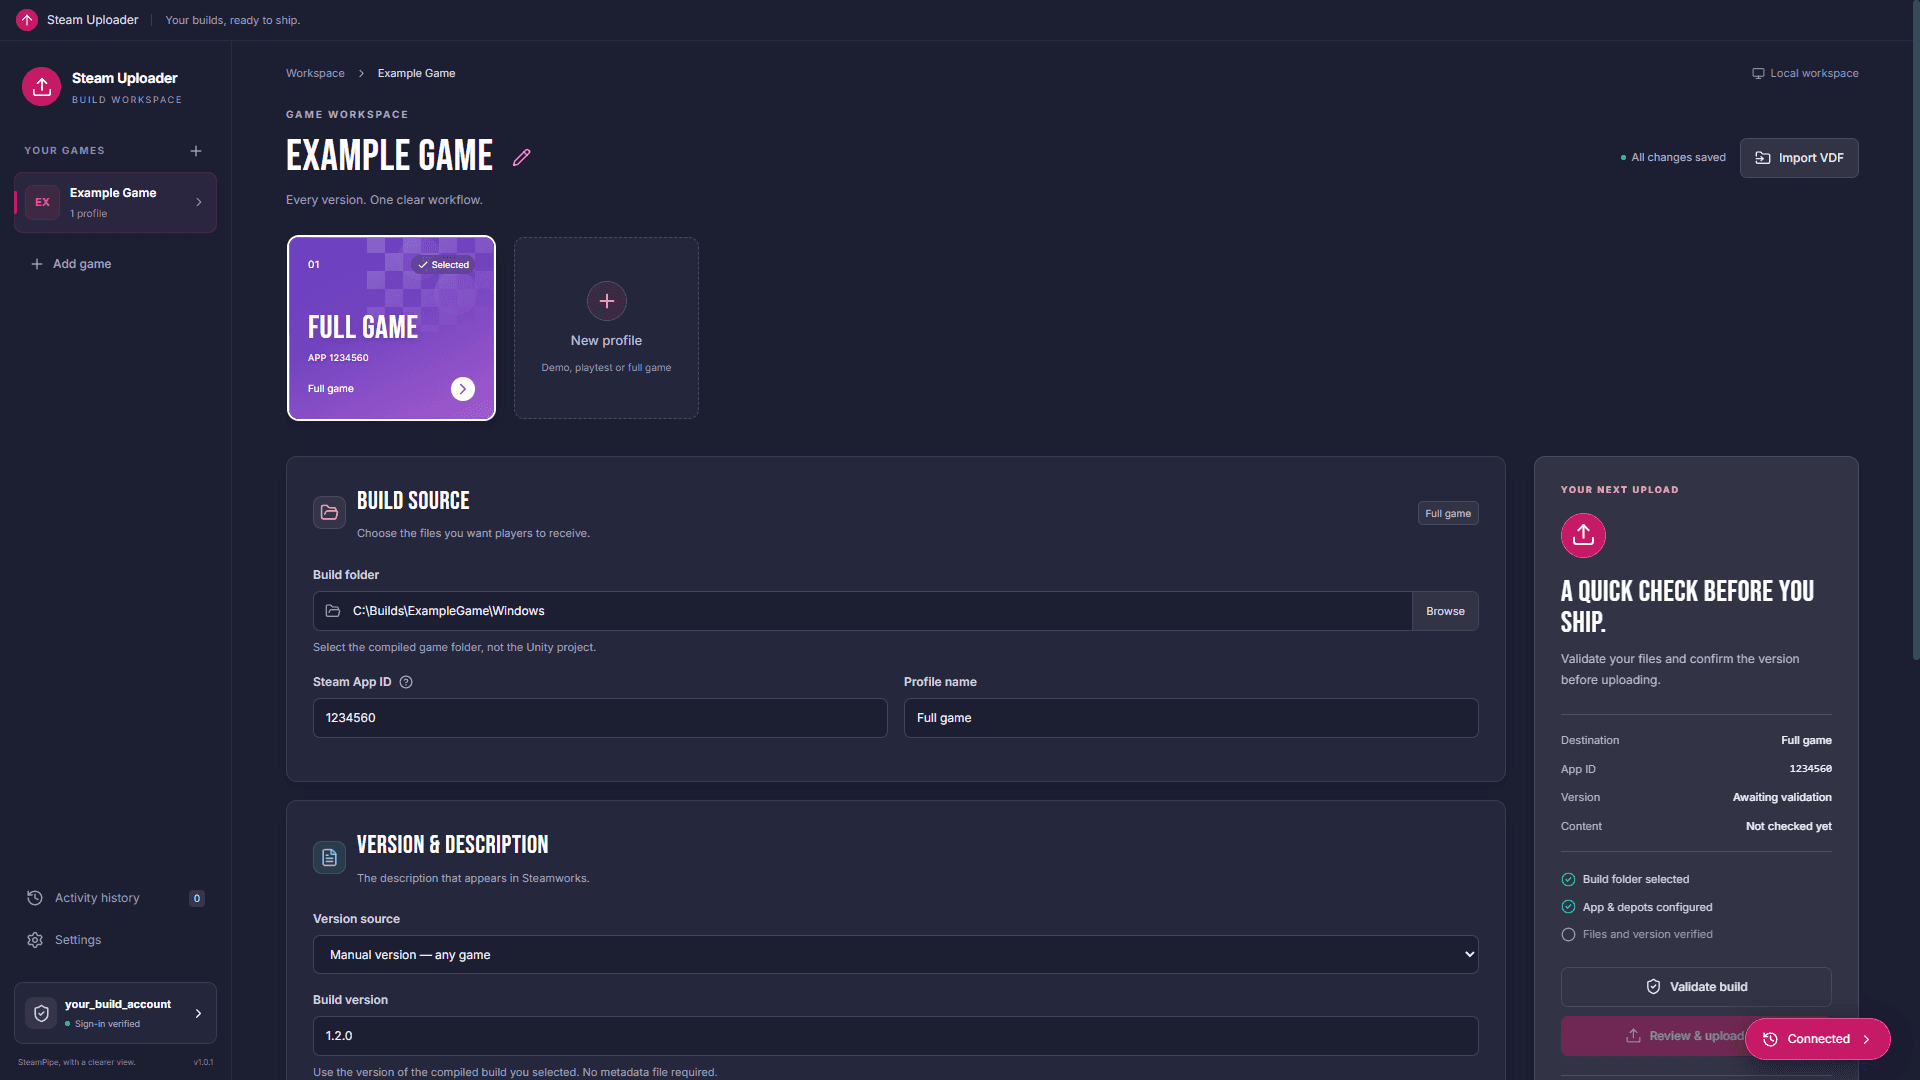
Organize games and build profiles.
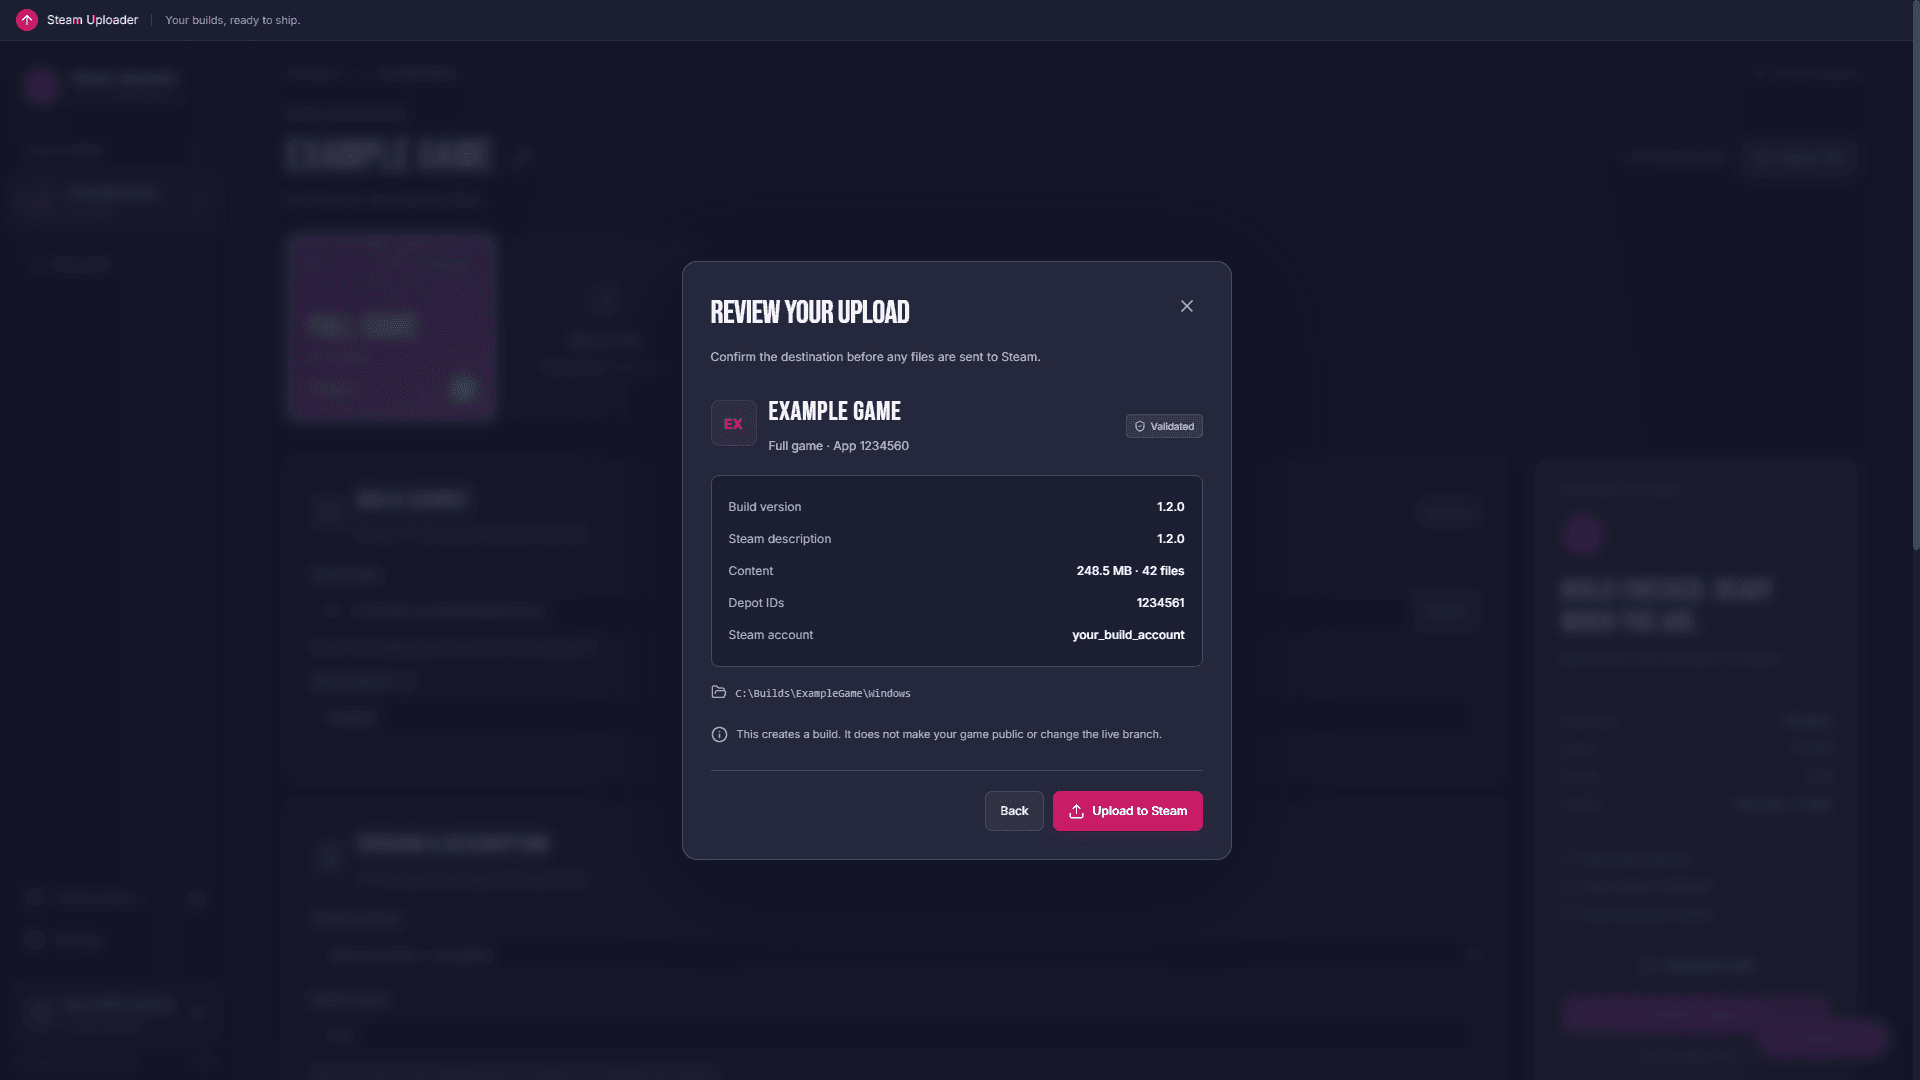
Check the destination before you upload.
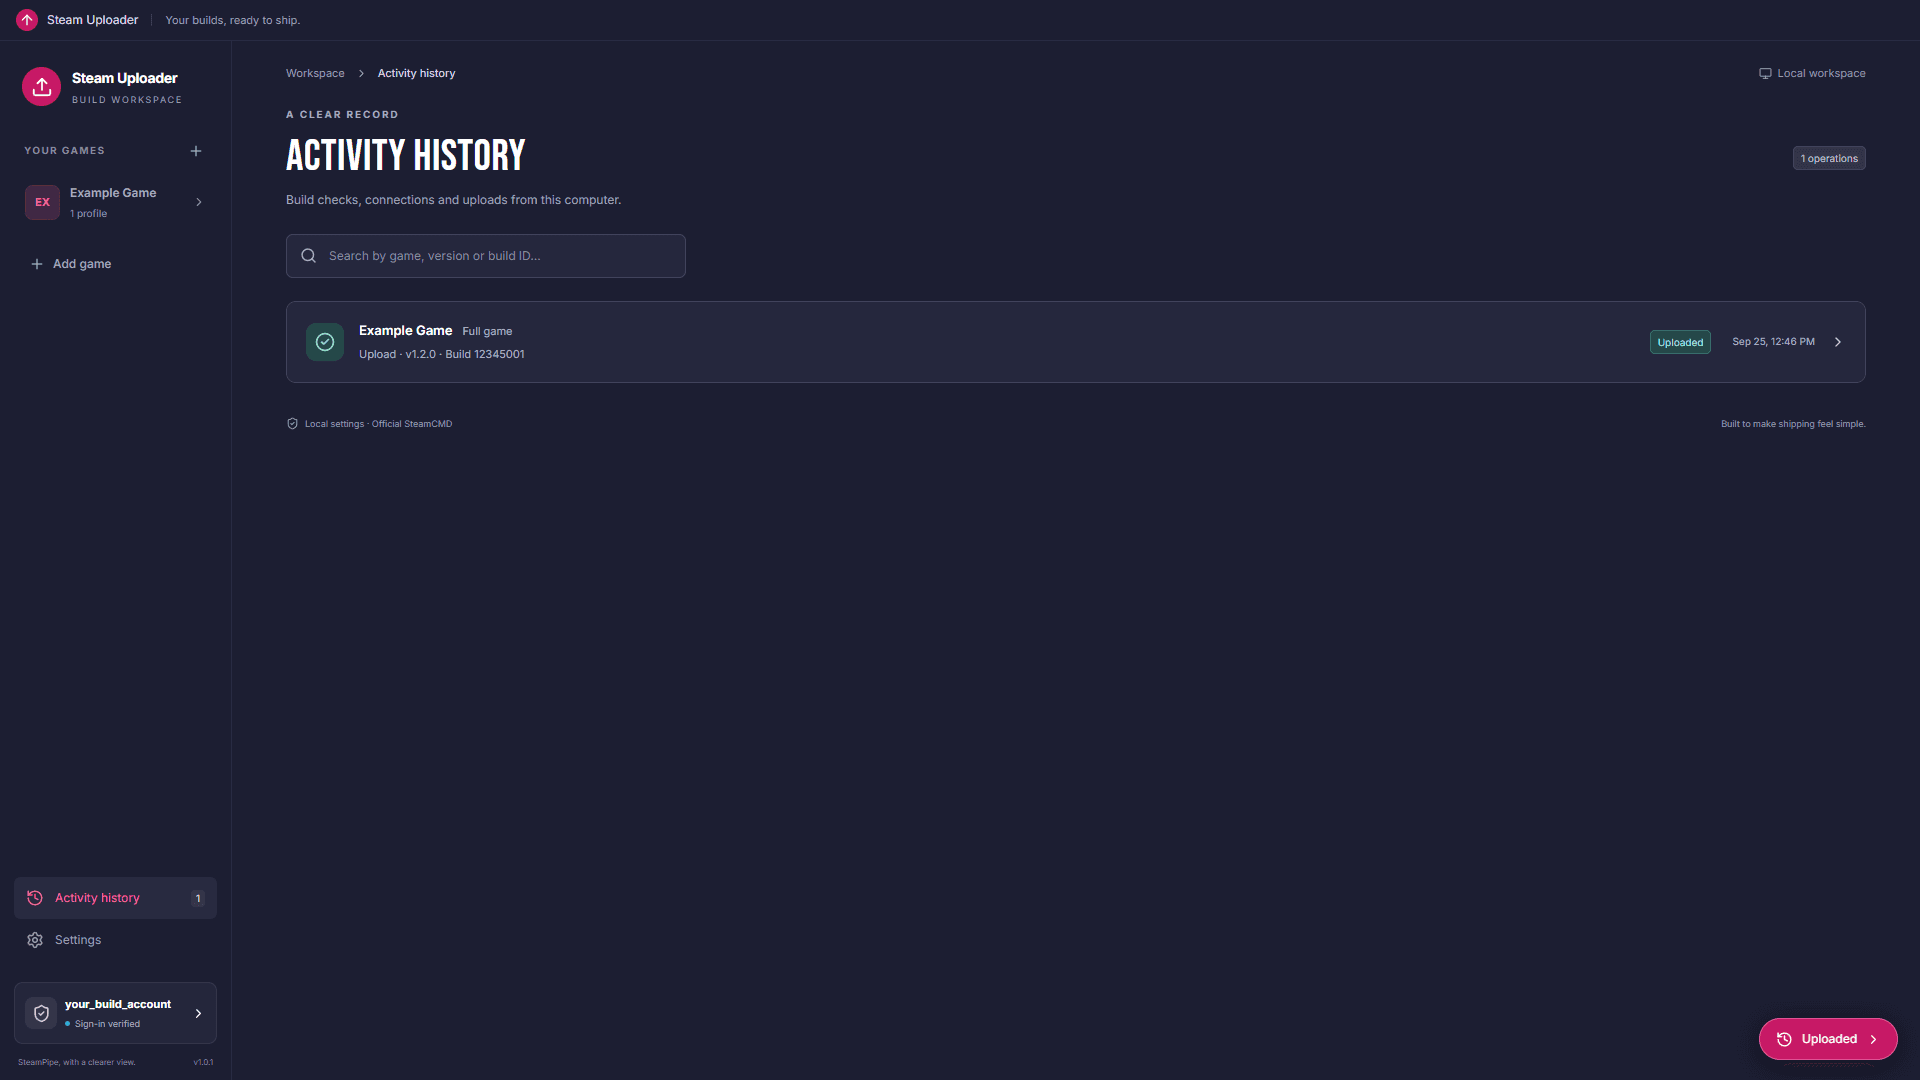
Keep track of confirmed Steam Build IDs.
About This App
- Platform: Windows x64
- Version: 1.0.1
- Format: Portable desktop application
Tools & Technologies
Electron, React, TypeScript, Tailwind CSS, SteamCMD
Links & Guide
Your builds. One workspace.
Steam Uploader is a desktop workspace for sending your finished game builds to Steam. Keep multiple games, demos and playtests in one place, with saved profiles for each destination and a clear view of what happens during an upload.
Choose a build folder, configure its AppID and depots, validate the files, then review the upload. Guided Steam sign-in, progress, logs and activity history help you understand what needs your attention and when Steam has confirmed a build.
Use a manual version with any game, read Unity Player Settings, or opt into a compatible build manifest. SteamCMD is included. Your settings stay on your computer, and you choose when to activate a build in Steamworks.
Steam Uploader · Windows · v1.0.1
From local build to Steam
A step-by-step guide for developers who already have a compiled build and a Steamworks app. Connect your account, check your files, upload, and choose the version your players receive.
Before you begin: have your compiled game folder ready, along with access to its Steamworks application. This guide covers uploading an existing build, depots and build branches. It does not cover Steam Direct registration or creating a store page.
Screenshots show the actual app interface at 1920 × 1080 with example data. Replace Example Game, your_build_account, AppID 1234560, DepotID 1234561 and all paths with your own values. Authentication, validation and upload states are illustrative, not records of an actual Steam upload. Click a tutorial screenshot to enlarge it without leaving this page.
1. Open Steam Uploader
Download the Windows release from Steam Uploader on itch.io, then run Steam-Uploader-1.0.1-Windows-x64.exe. You can share the executable on its own. Profiles are saved in your Windows user data; sharing the EXE does not share your Steam account or settings.
SteamCMD is included. Internet access is required to update it, sign in and upload files. You do not need to install the Steamworks SDK separately.
01. The welcome screen, before adding your first game. Click to enlarge
2. Verify your Steam account
- Open Settings in the sidebar.
- Enter your login name in Steam account name, not your public display name.
- Click Connect to Steam.
- Follow the request in the activity panel at the bottom right.
The account needs access to your Steamworks app. For a build account, Valve specifies Edit App Metadata and Publish App Changes To Steam permissions. Ask your project administrator if these are missing. Build account requirements.
02. An account name has been entered, but sign-in has not been verified. Click to enlarge
If Steam asks for a password
Enter Steam password, then click Continue securely. Remember on this Windows account is optional; it stores the password encrypted for that Windows user.
03. The password prompt appears in the activity panel. Click to enlarge
If Steam asks for Steam Guard
Enter the current code in Steam Guard code, then click Continue securely. Use the code from your authenticator or email, depending on your account's sign-in method.
04. An example Steam Guard code request. Click to enlarge
Steam may instead ask you to approve the sign-in in its mobile app. Open Steam → Steam Guard, review the request and approve it. The uploader continues when Steam confirms access. You will not necessarily see both methods.
05. Mobile approval is another possible sign-in step. Click to enlarge
How to tell whether you are signed in
Look for Sign-in verified under Settings → Steam account, along with the explanation and verification time. The account card in the sidebar also shows this status.
06. The verified state and its explanation. Click to enlarge
If no password was requested, read the explanation. SteamCMD may have reused its own saved session, or Steam Uploader may have supplied a password you chose to remember. Having the Steam desktop client open does not, by itself, verify this app's account.
| Status | Meaning |
|---|---|
| Sign-in not verified | Access has not been checked in this app session. |
| Action required to sign in | Complete the password, code or mobile approval request. |
| Sign-in verified | Steam confirmed the sign-in. |
| Sign-in was not completed | Read the error and log before trying again. |
Use Check connection to verify access again. Account verification does not guarantee access to every AppID or depot; Steam checks permissions during upload. An anonymous connectivity check cannot upload your game.
3. Find your AppID and DepotID
Open Steamworks and select the application that should receive this build.
- AppID: copy the ID shown beside that application's name.
- DepotID: open SteamPipe → Depots and copy the destination depot's ID. Check its platform and language settings. Do not calculate its ID from the AppID.
- If a depot is missing, create it in Steamworks and save/publish the requested configuration changes. Adding a depot row in Steam Uploader does not create a remote depot.
- For a Demo or Playtest, use that application's own IDs, not the main game's IDs.
Steamworks depot documentation.
4. Add a game and build profile
- Click Add game.
- Enter the game's name.
- Choose Full game, Demo, Playtest or Custom under First profile.
- Click Create game.
07. Create a game and its first local profile. Click to enlarge
In Build source, fill in:
| Field | What to enter |
|---|---|
| Build folder | The compiled build folder containing the executable and all its data. For Unity, do not select the project folder here. |
| Steam App ID | The AppID you copied from Steamworks. |
| Profile name | A name you recognize, such as Full game, Playtest or Publisher QA. |
08. Set the compiled build folder and the destination AppID. Click to enlarge
To rename the game, click the pencil beside its title. Enter the name and confirm with the check mark or Enter. Escape or the X cancels. Renaming saves the game name without saving other pending profile edits.
09. Rename the game directly in its workspace. Click to enlarge
Choose New profile for another destination. Its AppID and DepotID start empty, so enter the correct IDs for that build.
10. Add another profile without reusing destination IDs automatically. Click to enlarge
Profiles are local configurations. Calling one Publisher QA does not create a QA branch or restrict access in Steam. You choose the Steam branch after uploading.
Already have SteamPipe scripts? Use Import VDF and select the application VDF, such as app_build.vdf or app_playtest.vdf. Review the imported settings. Do not select the CMD launcher.
5. Choose a version source
Under Version & description → Version source, choose how this game's version should be read.
Manual version — any game
Enter the compiled build's version in Build version, for example 1.2.0. This is the simplest option and requires neither a manifest nor a Unity project.
Set Steam build description to {version} to send just the version number, or use a label such as QA {version}. Check the description preview before uploading.
11. A manual version with a description that uses the version number. Click to enlarge
Unity Player Settings — optional
Select the source project in Unity project folder. The uploader reads its configured version. Build folder must still point to the compiled game.
If you change the version in Unity Player Settings, rebuild the game too: changing that setting does not update an old executable.
12. Read the version from a Unity project. Click to enlarge
Build manifest — optional
Use this only if your build process already produces a compatible manifest with a version, file list and hashes. Enter its path relative to the build folder in Manifest file; the filename can differ between games. Version 1.0.1 supports one depot in this mode.
An arbitrary JSON file is not automatically a compatible manifest. If your game does not have one, use Manual or Unity.
13. Configure a manifest only for games that produce the supported format. Click to enlarge
6. Configure depot files
In Content depots, enter the Depot ID copied from Steamworks. Label is just a local name for recognizing it.
For a complete build in a single depot, expand Folder, mappings & exclusions and start with:
| Field | Typical value |
|---|---|
| Depot folder override | Leave empty to use Build folder. |
| Local files | * |
| Depot folder | . |
| Recursive | Enabled, so subfolders are included. |
Review Excluded files, one pattern per line. Leave out debug files and backups that should not ship, but keep DLLs, data and plugins the game needs.
14. The depot folder, file mappings, recursive setting and exclusions. Click to enlarge
Use Add depot for additional existing depots in Manual or Unity mode. Use folder overrides when they contain different files. Also check that the Steam packages granted to your players include the required depots. Depots and package access.
Click Save changes or press Ctrl+S. Save & validate build saves and validates in one action.
7. Validate the build
- Click Validate build.
- Wait for Build validated. Review the details before uploading.
- Check the version, file count and size.
- Open View validated files to review the selected files and their destinations.
15. Local validation has finished; no upload has happened yet. Click to enlarge
16. Preview the files selected by your depot rules. Click to enlarge
For large builds, the preview shows a sample; all selected files are validated. Fix incorrect versions, outdated paths or manifest mismatches before continuing, then validate again.
Validated means checked locally. It does not mean uploaded to Steam.
8. Review and upload
- Click Review & upload.
- Check Steam account, App ID, Depot IDs, version, description, build folder and size.
- When everything matches, click Upload to Steam.
17. Review the account, destination and build before sending files. Click to enlarge
The activity panel follows Prepare → Sign in → Build → Upload → Finish. Some stages show a percentage; others show ongoing activity. Prepare sets up the tools and a verified copy of the selected content. Leave enough disk space for that copy and SteamPipe's cache.
18. Upload progress, with the current stage highlighted. Click to enlarge
A stage's percentage is not the completion percentage for the entire process. Wait for Build … uploaded to Steam and a STEAM BUILD ID. This Steam-assigned identifier is different from your version number.
19. An illustrative success state with the confirmed Steam Build ID. Click to enlarge
Use Activity history to find the result again.
20. Upload history keeps the result and its Steam Build ID. Click to enlarge
Steam Uploader uploads the build. It does not automatically activate default or any other branch.
9. Set the build live in Steamworks
Click Open Steamworks, then open SteamPipe → Builds for the correct AppID.
- Find the Build ID reported by Steam Uploader.
- Under Set build live for branch…, choose the intended branch. Choose default for the normal version received by users with access.
- Click Preview Change, review the depot changes, then Set Build Live Now.
- Complete mobile confirmation if Steam requests it.
For internal testing, select or create a test branch and configure its access. A password-protected branch controls who can select it among users who already own or can access the app. A local uploader profile does not configure this.
Changing default may update current users; it is separate from releasing an unreleased store page. Default must be activated manually in App Admin. Steamworks builds and branches.
Test the download with an account that has access to the app and depots. To select a test branch in Steam, open Library → right-click the game → Properties → Game Versions & Betas. Selecting a branch.
Troubleshooting
| What you see | What to do |
|---|---|
| Sign-in not verified | Enter your account name and click Connect to Steam. |
| Action required to sign in | Complete the request in the activity panel. |
| Sign-in was not completed | Check the message and log, then retry. |
| Missing SteamCMD or a Prepare failure | Close the app and open the latest EXE. The upload has not started yet. |
| Access denied | Check the account's permissions for the AppID and depots. |
| No content changes in Steamworks | Check that Build folder contains your newly compiled game. Changing only the description does not change the game files. |
| Cancelled or Interrupted | Success was not recorded. If Steam was finalizing the build, check Steamworks Builds before uploading again. |
21. A preparation failure does not mark sign-in or upload as completed. Click to enlarge
Use View live log for current output and Open full log for the complete record. Review logs before sharing them; they may contain local paths and account names.
If you need an existing SteamCMD client, go to Settings → SteamCMD → Advanced options → Custom SteamCMD executable and select the official steamcmd.exe. Leave this empty to use the included client. A custom client manages its own saved session.
22. Optional SteamCMD settings and local storage information. Click to enlarge
Version 1.0.1 is unsigned. If your antivirus checks or isolates the executable, let it finish and inspect the result before trying again. Antivirus approval and Steam sign-in are separate steps; do not treat an antivirus prompt as an upload status.